

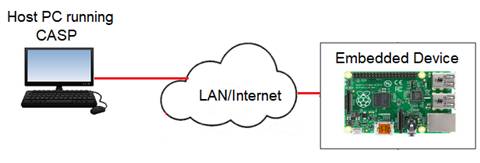
Remote Build & Deploy feature (‘RBuild’ in short) allows CASP models to be developed on the host computer and later build and be deployed (executed) on the target with a single button click on the host computer. Most of the targets listed under ‘Embedded OS’ and ‘Desktop/Server’ architectures support remote build feature. For this to work, the target can be of any embedded, SBC or desktop computer (for example Raspberry Pi) running Microsoft Windows or Linux operating system and should support CASP ‘SimPanel’. Both host and target computers should be connected through LAN or Internet (Internet connection should have a static IP).
Getting Started
Step-1: Select a suitable target board or computer that supports CASP remote build feature. Ensure host and the target are connected on the network and can communicate each other. Use ping tool to check the connection.
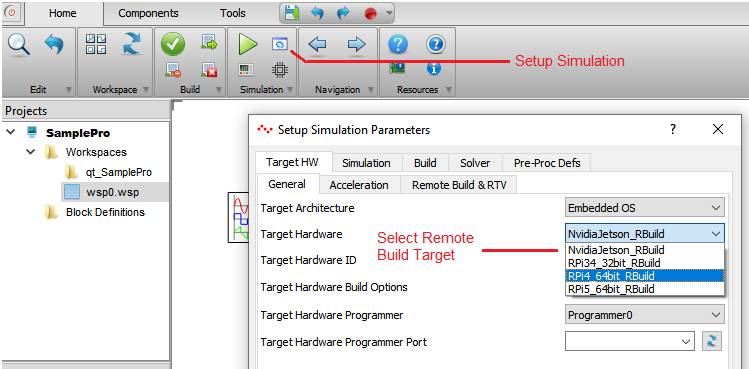
Step-2: On the host PC start CASP, create or open a project. Click on ‘Simulation->Setup Simulation’ icon and select the remote build target from the dialog box (as shown in below figure).
Step-3: Select ‘Build->Generate RBuild BSP’. From the dialog window select a suitable destination folder and click on ‘Generate’ button to create a directory in the ‘Destination Folder’ selected by the user. The directory contains remote build target’s BSP and toolchain files.
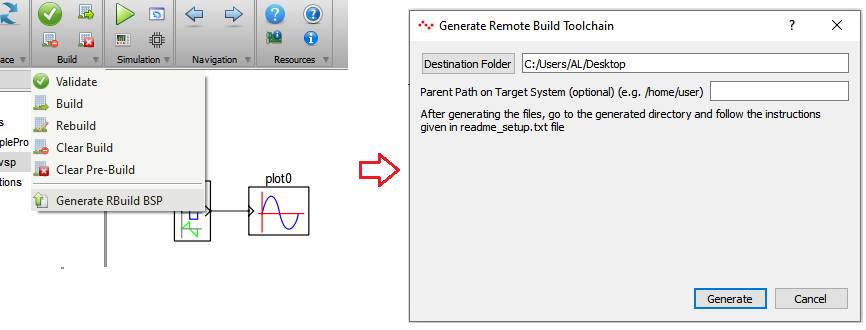
Step-4: Copy the folder to the target’s user directory. Open the ‘readme_setup.txt’ file from the directory and follow the steps mentioned in the file to install BSP and required dependencies. User may have to connect the target to the internet to download required dependencies.